

If you’re looking for a classic, indulgent Christmas cookie, Vanilla Bean Dream Cookies are the ultimate soft and sweet sugar cookie. The recipe is detailed with step-by-step instructions, making it easy to make at home and enjoy Christmas.

Table of Contents
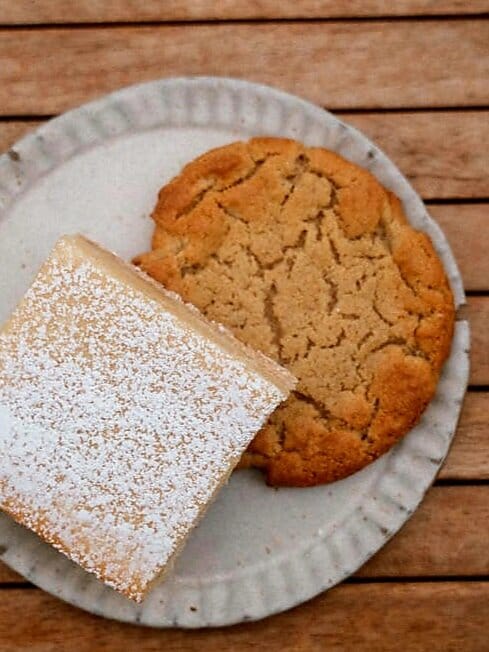
Vanilla Bean Dream Cookies : The Ultimate Soft and Sweet Sugar Cookie
Vanilla Bean Sugar Cookies are the perfect vanilla bean sugar cookie recipe for bakers across the USA. When you love soft, chewy, bakery-style sugar cookies with authentic vanilla flavor, Vanilla Bean Dream Cookies are sure to become your new obsession.
They’re incredibly easy to make, made with simple ingredients, and baked to golden perfection.
They’re a great idea for Christmas Day, parties, lunch boxes, or everyday snacking. You can try these at home for a bakery-style treat. Beginner and pro tips for a perfect result, all step-by-step, with answers to frequently asked questions at the end.
Why so many people love Vanilla Bean Dream Cookies:
- They have a chewy, soft texture with a crisp edge.
- Very easy to bake, making them great for beginners.
- This recipe has the flavor of a real vanilla bean—aromatic, warm, and wonderful.
- Perfect for frosting, decorating, or eating plain.
- This recipe is freezer-safe and meal-prep-friendly.
All ingredients needed:
Dry ingredients:
- 1 teaspoon baking soda,
- 1/2 teaspoon baking powder
- 1/2 teaspoon salt,
- 2 1/4 cups all-purpose flour
Wet Ingredients:
- 1 1/2 cups granulated sugar
- 1 large egg
- 1 cup unsalted butter, softened at room temperature
- 1 whole vanilla bean, deseeded
- 2 tablespoons milk, optional – for softening
- 2 teaspoons vanilla extract
Rolling Ingredients – optional
1/2 cup granulated sugar
Vanilla Bean Dream Cookies, Step-by-Step Guide:
1. Preparing the Oven and Tools
- Preheat the oven to 350°F, 175°C and have it ready.
- Line a baking sheet with parchment paper.
- Bring the eggs and butter to room temperature and mix thoroughly.
Tip: Room temperature butter traps more air, which helps your cookies stay soft and rise evenly.
2. Mixing All Dry Ingredients –
Use a medium bowl and whisk together the ingredients in the indicated quantities:
- baking powder,
- flour,
- baking soda,
- salt
- Beat and set aside.
- This step ensures your leavening agent is evenly distributed, resulting in perfect cookies.
3. Beating the Butter and Sugar
Use a large mixing bowl:
- Add 1 cup of butter and 1 1/2 cups of sugar and beat for 3 to 4 minutes.
- An electric mixer is best for beating, and beat until it becomes slightly fluffy and creamy.
Why this is important:
Because creaming adds air to the dough, which is crucial for texture.
4. Adding the Egg and Vanilla Extract for the Vanilla Bean
- First, add the egg and mix thoroughly, then continue beating.
- Add the vanilla extract.
- Cut the vanilla bean lengthwise, remove the seeds, and add it to the bowl.
- At this point, your dough should start to smell wonderful.
5. Adding the Drying Ingredients:
- Slowly add the flour mixture to the prepared wet mixture.
- Keep mixing on low speed until it forms a soft, thick dough.
- When the dough feels dry, add 2 tablespoons of milk.
6. Rolling the Dough
- Take a tablespoon of dough, place it between your palms, and roll it into a smooth ball.
- Optional: For a sparkling finish, roll each dough ball in granulated sugar.
- Place the cookie balls on the baking tray, spacing them 2 inches apart.
7. Baking
- Bake at 350°F for 10 to 12 minutes;
- until the edges are well set and the center appears slightly undercooked.
- Note: Keep the cookies on the baking tray after removing them from the oven. As the cookies continue to bake, removing them quickly will make the cookies soft and chewy, making these Vanilla Bean Dream cookies.
8. Cool and Enjoy
- Let the cookies cool to room temperature.
- Let them cool on the baking sheet for 5 to 7 minutes, then remove them to a cooling rack.
- Your Vanilla Bean Dream Cookies are now ready.
Some great tips for perfect bakery-style cookies:
- Using real vanilla beans gives the cookies a rich and delicious flavor.
- Chilling the Dough: Optional: For thicker cookies, refrigerate the dough for 30 to 35 minutes.
- Adding extra vanilla improves the taste of the cookies.
- Don’t bake the cookies for too long. Remove them when the center begins to look soft.
- Easy to spread the dough evenly – level with a spoon; be sure to never overfill the cup.
Storage:
- Here are some great tips for storing Vanilla Bean Dream Cookies to ensure they last longer:
- Store at room temperature in an airtight container for up to 6 to 7 days.
Freezing:
- Baked cookies can be refrigerated for up to 3 months.
- Unbaked dough balls can be refrigerated for up to 2 months.
- Bake the dough balls directly from frozen, but add 1 minute to the baking time to allow for thawing.
FAQ
Answers to Vanilla Bean Dream Cookies and how to fix mistakes:
Q. Can I add frosting?
Yes! Vanilla buttercream, cream cheese frosting, or a simple glaze work perfectly, which is fine.
Q. Can I make them gluten-free?
Yes! Use a gluten-free baking blend instead of the flour.
Q. Can I use vanilla bean paste on everything?
Yes! Use a tablespoon of vanilla bean paste instead of the beans.
Q. How can I make the cookies softer?
Add 2 tablespoons of milk.
Be sure to chill the dough and
slightly underbake.
Q. Why do cookies spread more?
Reasons:
When your butter is too soft
The dough isn’t cold
Too much sugar.
Q. Can kids help make this Vanilla Bean Dream Cookies recipe?
Absolutely! This is a favorite recipe for kids:
Rolling out the dough,
Coating the sugar, and,
Enjoying the final cookies.
Q. How can I make thicker cookies, bakery-style?
To make bakery-style Vanilla Bean Dream Cookies, be sure to chill the dough for 1 hour or increase the flour by two tablespoons.
Final Thoughts
Vanilla Bean Dream Cookies deliver everything you love in a sugar cookie. They’re soft in the center, lightly crunchy on the edges, and have a buttery flavor. They’re also flavored with a strong vanilla aroma.
The real magic comes from the vanilla bean seeds, which add a delicious flavor to every bite. With simple ingredients and excellent techniques, you can create memorable cookies every time.
This article explains all the easy recipes with step-by-step instructions. Even if you’re a beginner, you’ll be ready to master them and treat your family to cookies, which is even better this Christmas season.