

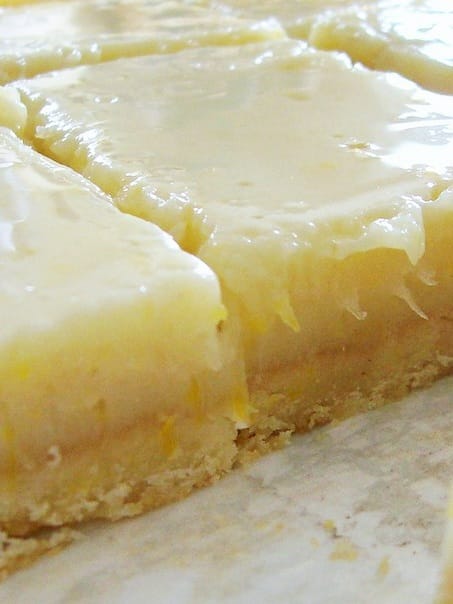
If you’re craving a dessert that’s bursting with golden zest bliss and all the instructions for perfect citrus squares, then “Homemade Lemon Bars” are the perfect recipe. Everyone loves it and it never disappoints.
Table of Contents
Homemade Lemon Bars : Golden Zest Bliss | Perfect Citrus Squares
With the perfect balance of sweet and sour flavors, golden zest bliss lemon bars are a real treat. With a buttery shortbread crust and a smooth, flavorful lemon filling, these classic bars are a firm favorite across America.
Whether you’re baking them for parties, family gatherings, or just for yourself or as a treat, you can easily make these amazing lemon bars without any mistakes with the complete instructions in this article.
Why You’ll Love These Lemon Bars
- Made with simple pantry ingredients
- Easy to make in advance
- Ideal for picnics, holidays, and dessert.
- The perfect balance of sweet and sour
- Beginner-friendly and very easy to follow.
All ingredients needed:
Ingredients for the shortbread crust:
- 2 cups flour
- 1 cup 225g softened unsalted butter
- 1/4 teaspoon salt
- 1/2 cup granulated sugar
Ingredients for the lemon filling:
- 4 large eggs
- 2 cups granulated sugar
- 1 tablespoon lemon zest
- 2/3 cup fresh lemon juice – about 5 lemons
- 1/4 cup flour
Ingredients for the topping:
- Powdered sugar – for dusting
How to make homemade lemon bars, step-by-step instructions:
1. Preheat and Prepare
- Preheat the oven to 350°F, 175°C.
- Use a 9×13-inch baking pan.
- Lightly line it with parchment paper.
- Lightly grease the edges with parchment paper to prevent sticking.
2. Making the Shortbread Crust
- Use a large mixing bowl.
- Add the sugar and butter and beat well until smooth.
- Add the flour and salt.
- Keep mixing until a soft dough forms.
- Press the dough evenly into the prepared pan.
- Note: It should be firm and firm.
- Tip: It’s best to use the bottom of a glass to flatten it evenly.
3. Baking the Crust
- Bake the crust for approximately 18 to 20 minutes, or until lightly golden brown.
- Remove from the oven and set aside.
4. Prepare the Lemon Filling
- Now use another bowl.
- Keep whisking the flour and sugar together.
- Add the egg and mix well.
- Then, add the lemon juice and zest and mix well.
- Keep mixing until smooth and slightly thickened.
5. Pour and Bake
- Pour the prepared lemon mixture onto the hot crust.
- Continue baking for about 22 to 25 minutes, until the center is well set and no longer jiggles.
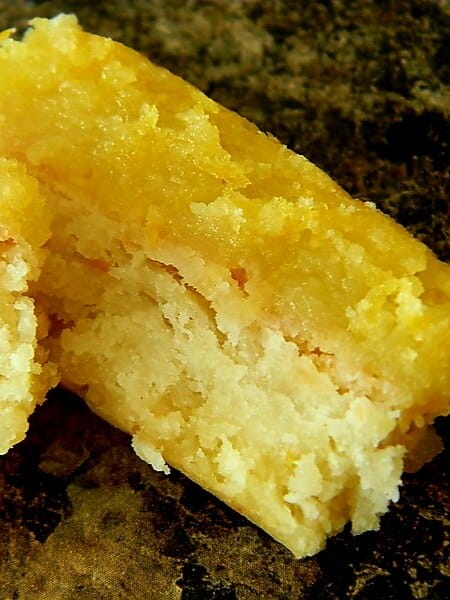
6. Cooling Completely
- Let the homemade lemon bars cool completely at room temperature. Then,
- Refrigerate for about 2 hours.
Tip: This freezing step is crucial for clean slicing.
7. Slicing and Serving
- Lift the bars using parchment paper.
- Cut them into squares.
- Sprinkle with powdered sugar.
- Serve chilled or at room temperature.
Some expert tips for perfect homemade lemon bars:
- Avoid overbake—If you overbake, the filling becomes rubbery instead of creamy.
- Always use fresh lemon juice—fresh lemons give a brighter, more natural flavor than bottled juice.
- Be sure to use parchment paper—it makes for easier removal and prevents sticking.
- Be sure to chill the lemon bars before cutting—chilled lemon bars cut more cleanly and hold their shape better.
Some variation suggestions:
- For Coconut Lemon Bars: Add grated coconut to the crust for texture.
- For Creamy Lemon Cheesecake Bars: Add a layer of cream cheese for a rich twist.
- For Gluten-Free Lemon Bars: Use a gluten-free flour blend for a diet-friendly version.
- For Berry Lemon Bars: Add raspberries or blueberries for a fruity flavor boost.
Storage Instructions:
- Here are some tips for storing homemade lemon bars properly, ensuring they last longer.
- Refrigerate: Store in an airtight container; they stay fresh for 4 to 5 days.
- Freeze: Freeze for up to 3 months.
- Store individually wrapped for best results.
Serving Suggestion:
- This recipe can be served with whipped cream.
- Perfect for a branch or dessert table.
- Perfect to serve with iced tea or coffee.
- Add mint leaves for garnish.
FAQ
Answers to questions about homemade lemon bars.
Q. Can I reduce the sugar?
Absolutely! But this affects the balance of texture and sourness.
Q. Can I use bottled lemon juice?
Fresh juice is recommended for the best flavor, but if necessary or on busy days, bottled juice also works.
Q. Why are lemon bars thin?
If undercooked, make sure the center is completely set before removing from the oven.
Q. How do you know when they’re done?
When you gently shake the pan, the filling shouldn’t move.
Q. Can I use another citrus fruit?
Absolutely! Try orange, lemon, or grapefruit for a unique flavor.
Q. Can I make homemade lemon bars ahead of time?
Absolutely! They taste even better the next day.
Q. Is it necessary to refrigerate lemon bars?
Yes! Refrigeration is advisable because of the egg filling.
Q. Can I double the recipe?
Yes! To double the recipe, use a larger pan and adjust the baking time accordingly.
Final Thoughts
Homemade lemon bars are the perfect combination of buttery richness and tang. This golden zest bliss, with its crisp shortbread base and silky lemon topping, creates bakery-quality results in your kitchen.
Whether you’re a seasoned baker or a beginner, this recipe is incredibly easy to make, reliable, and delicious. So, give it a try, and it stands a chance of becoming your favorite dessert.