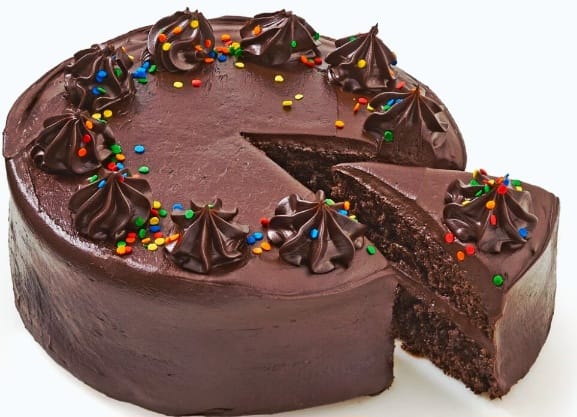
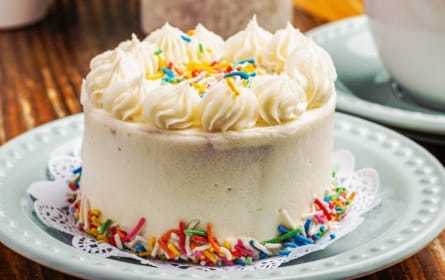
Here is a step-by-step guide to Juneteenth cake recipe (KrogerJuneteenth) . That is inspired by the Kroger style of celebratory desserts and is popular across most of the US.
Let’s find out how to make this Kroger inspired Juneteenth cake at home or in stores. Juneteenth is celebrated as a powerful celebration of freedom, African American heritage and culture. It’s a time of pride and community. There’s no better way to honor this day than by making this homemade showstopping Juneteenth cake that will be a joyous feast for all. And will be loved by all.
Kroger always highlights Juneteenth with a themed cake in vibrant red, yellow and green colors. So this recipe will take you right into the kitchen with all the emotions. Whether you’re planning a meal, backyard bivvies, community gatherings or quiet family dinners.
this cake is a bold, delicious and symbolic embodiment of the strength and resilience of the red color. Green color represents growth and progress while yellow and light golden color have always been considered a symbol of prosperity and new beginnings.
So let’s get started to make this cake which is not only delicious but also meaningful.

Table of Contents
Ingredients, for cake layer (makes 3 layers)
- 3 cups all-purpose flour
- ½ teaspoon salt
- 2½ teaspoons baking powder
- 2 cups granulated sugar
- ½ teaspoon baking soda
- 1 cup unsalted butter, softened
- 4 large eggs
- ½ cup whole milk
- 1 tablespoon vanilla extract
- 1 cup buttermilk, room temperature
- Colors (edible): green, red and yellow
Ingredients (for buttercream frosting)
- 6 cups powdered sugar
- 1½ cups unsalted butter, softened
- 5–6 tablespoons heavy milk or cream
- 2 teaspoons vanilla extract
- A pinch of salt
Optional but great garnishes
- Piping food coloring
- Green or red or gold sprinkles
- Gold dust or stars (edible)
- Raspberry or strawberry
- Juneteenth flag or you can use “Freedom” text as cake toppers
- Themed banner or mini flags Use
Step-by-step recipe
1. Prepare your workspace
Before you start baking:
Preheat your oven to 175°C (350°F).
Grease and flour three 8-inch round cake pans.
Line parchment paper on the bottom to prevent sticking.
Make sure all ingredients (especially the egg and dairy) are at room temperature for the best softness and texture.
2. Mix in the dry ingredients
In a medium mixing bowl, sift together:
Baking powder, flour, salt, and baking soda.
Combine the dry ingredients by slowly whisking them together, then set the bowl aside. This will help the dry ingredients rise evenly and keep the cake soft and delicious.
3. Creaming the Sugar and Butter
First, take a large mixing bowl or stand mixer and then:
Add the sugar and butter
Now beat on medium speed for 3 to 4 minutes or until the mixture becomes light and fluffy.
Creaming the sugar and butter helps to incorporate air into the mixture which is great for creating a softer, moister crumb which is great for the next step.
4. Using the Eggs and Vanilla
Never add the eggs all at once. Crack them in one at a time.
Be sure to beat well after each addition.
Now add the vanilla extract and mix well.
This will make the buttercream look thicker.
5. Wet and Dry Ingredients
Never mix them all at once. Add the wet and dry ingredients one at a time to combine.
Using a measuring cup, combine:
the whole milk and the buttermilk.
Slowly add the dry ingredients and the milk mixture to the butter-sugar mixture. Mix until combined:
Add only ⅓ of the dry ingredients and beat until well combined.
Add half of the milk mixture and beat well.
Repeat these steps until all the ingredients are combined.
Important Note: Never use too much mixture in this step as doing so will make your batter and cake thick.
6. Divide the batter and add color
- This is where your Juneteenth magic begins.
- First, divide the batter equally into three bowls.
- In the first bowl, add red food coloring and make sure it turns a deep red color.
- In the second bowl, use each food coloring to get a dark green layer.
- In the third bowl, use yellow food coloring to get a bright golden layer.
- Now, make sure to mix all the bowls gently whenever the batter becomes loose to avoid this.
7. Baking the Layers
Now, pour the green batter into the prepared cake pan.
- Tap the pan lightly to remove any air bubbles. Be sure not to tap hard. Bake for 24 to 26 minutes, making sure a toothpick inserted in the center comes out clean. If it doesn’t come out clean in this time, check for a few more minutes so that all the toothpicks come out clean.
- Then let the cake cool in the pan for 10 to 12 minutes.
- When it cools down a little, take it out of the pan and let it cool completely on a wire rack.
- Important things: If you want a flat layer, then after it cools completely, use a serrated knife to flatten the top.
For Fasting and Assembly
8. Make Buttercream Fasting
- Using a stand mixer: –
- Keep beating the butter on a light medium speed for 3 minutes until it becomes creamy.
- When you add sugar, add only one cup of powdered sugar at a time. Do not add more than this.
- Now add salt, vanilla extract and 4 tablespoons of heavy cream to it.
- Now keep beating it on high speed for 4 minutes, until it becomes fluffy. Now wait for few minutes and if needed you can use some more cream to adjust it.
- Later you can use red, yellow and green colors in small batches of fasting for decoration.
9. How to assemble the cake
- Place the red cake layer on a cake stand or serving plate.
- Spread a generous layer of frosting over it.
- Now add the yellow cake layer and frost it.
- Frost each layer evenly.
- Now spread a thin layer of frosting over the entire cake, making sure to have a light layer of frosting.
- Now chill the cake in the fridge for 20 to 22 minutes to ensure the crumb sets well.
10. What is the final frosting layer
- When it cools down, spread the frosting generously over the entire cake.
- Use a bench scraper or offset spatula to smooth it out.
- If you want a bakery cake look, leave the edges half exposed or you can cover it completely.
Decorate your Kroger Juneteenth cake
11. Add a creative touch
This is your chance to celebrate, decorate it based on your style and the occasion or you can do it yourself.
Always use the same fastenings to pipe stripes or swirls or rosettes.
For sprinkles you can use red, green and gold edible glitter or confetti.
Now you can use fresh strawberries or even raspberries to get a pop of red.
For Juneteenth themed cakes you can use toppers or DIY flags.
You can celebrate independence on top or you can write a message like Juneteenth 1865 which everyone will love and look awesome.
Serving Suggestions
- You can serve this cake at room temperature or chilled.
- This fruit punch is a great accompaniment to a sweet iced or lemonade.
- A BBQ with ice cream or peach cobbler is perfect for the dessert table.
- Always cut it in slides. Doing so reveals the bold red, yellow and green layers, so all the bites are in one view and tell delicious stories.
- If you don’t want to serve this, put the cake in the fridge. It will keep for three to four days. This is great if you can’t use it all.
Unfrosted, the individual layers can be wrapped tightly in plastic wrap and kept in the fridge for up to two months.
If you want to avoid frosting your cake by drying it out, always use an airtight container.

Additional Tips and Variations
For extra flavor:
- Adding almond or lemon extract to the batter can add a twist.
- Always use gel food coloring if you want a clear color.
- If you need something different, consider using a dairy-free alternative to buttermilk (or almond milk + vinegar)
- For a tangy flavor, try a creamy cheese frosting.
Final Thoughts
Juneteenth cake (Kroger Juneteenth) is not just about dessert, it’s about celebrating heritage and hope. This colorful cake, which is easily available at stores like Kroger, can be enjoyed by people who bake it at home. It is full of flavor and great for personalizing the color message. And believe me, once you make it at home, you will never like the store bought one. So homemade is extremely delicious and is a favorite of all.
Whether you are doing a big event or baking on a casual basis, this cake is a sweet reminder of how far we have come.
And the power of resilience and unity.
Happy Juneteenth Cake recipe to all of you.

1 thought on “Kroger Juneteenth Cake Step-by-Step 2025”