
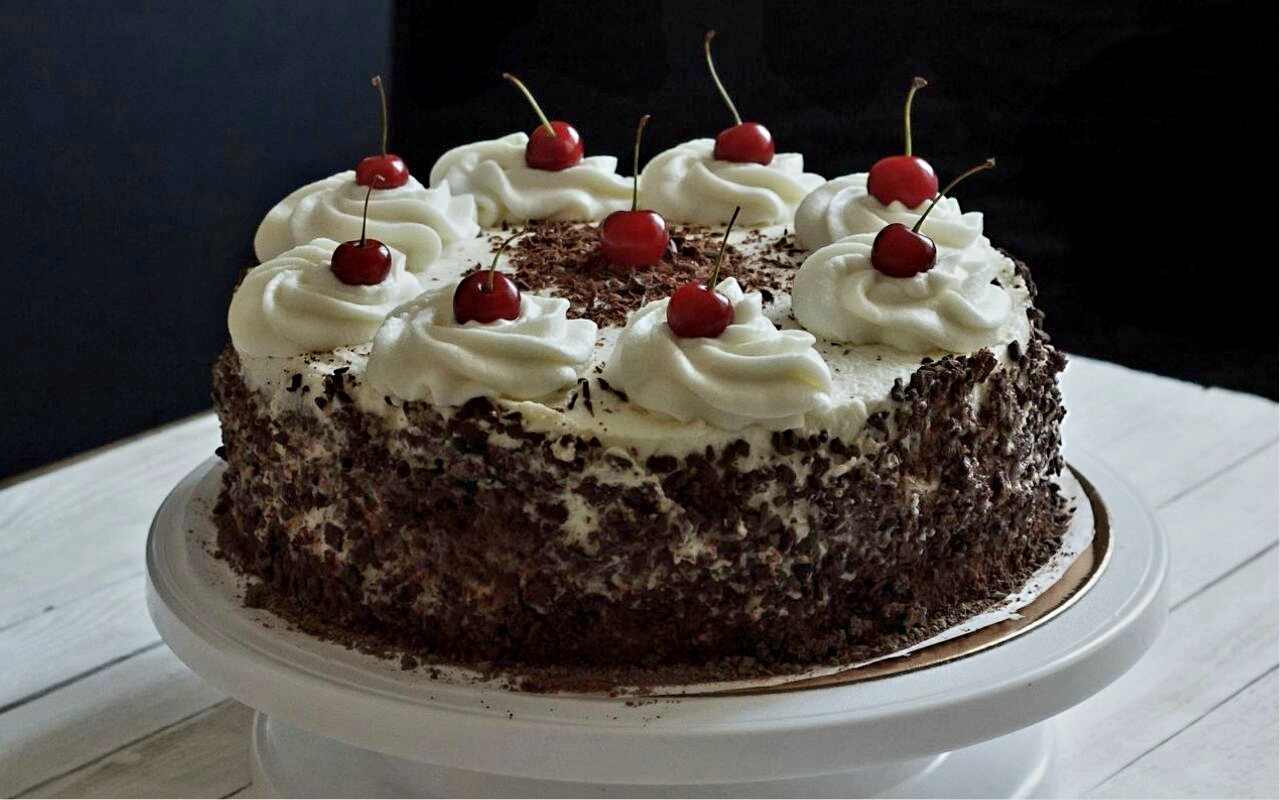
If you’re looking for the perfect chocolate cherry layer cake, filled with rich chocolate, sweet cherries, and fluffy whipped cream, the “Classic Black Forest Cake” is the perfect choice. The step-by-step instructions in this article make it easy to make at home.
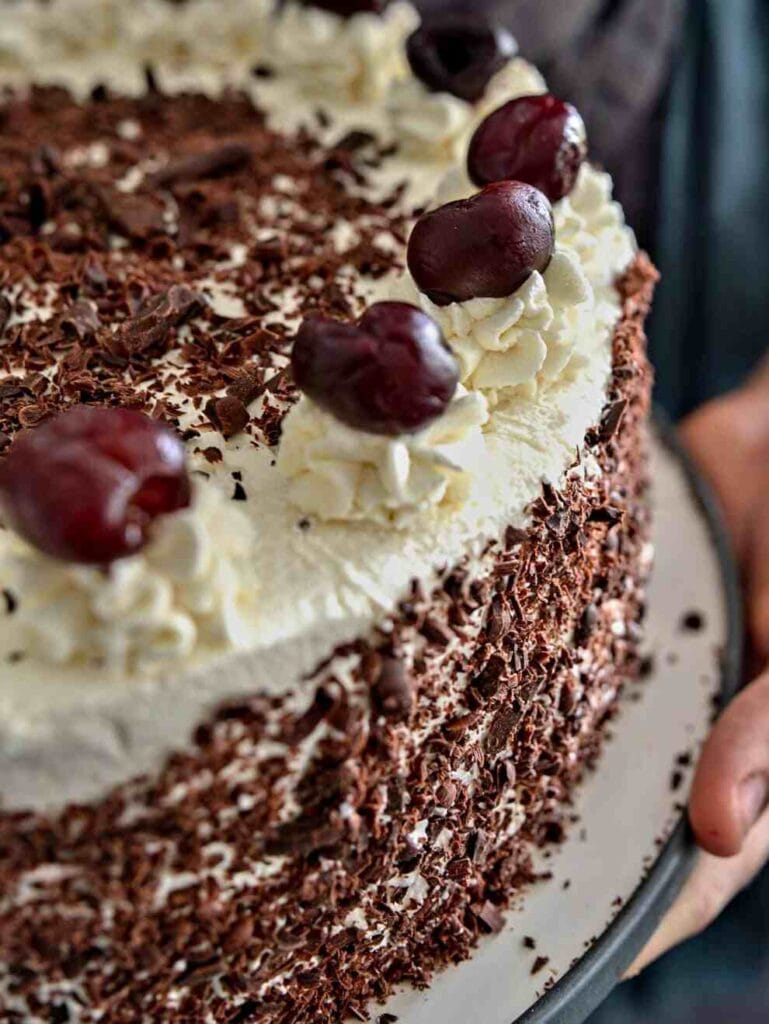
Table of Contents
Classic Black Forest Cake: Chocolate Cherry Layer Cake
This moist chocolate cake layer, juicy cherries, lightly sweetened whipped cream, and chocolate shavings, along with all the slices, create a delicious combination of flavors and textures, known for its stunning appearance and amazing taste.
Black Forest cake are perfect for holidays, birthdays, dinner parties, anniversaries, and any special weekend baking. These finished cakes look like bakery cakes, but following everything step by step makes the process incredibly easy.
This homemade version uses simple ingredients and delivers soft chocolate crumb, creamy frosting, and bright cherry flavor without much effort.
Why you’ll love the classic Black Forest cake?
- Filled with a sweet and tangy cherry filling
- A rich and moist chocolate cake
- A light, fluffy whipped cream filling
- Perfect for beautiful chocolate shavings
- Perfect for birthdays and celebrations
- Easy to prepare in advance
- Flexible, great for decorating
- Provides a great homemade alternative to bakery cakes
All Required Ingredients:
Ingredients for the Chocolate Cake:
- 2 large eggs
- 2 cups all-purpose flour
- 2 teaspoons vanilla extract
- 2 cups baking powder
- 1 cup hot water or hot coffee
- 1 cup buttermilk
- 1 1/4 cups granulated sugar
- 1 teaspoon baking soda
- 1/2 cup vegetable oil
- 3/4 cup unsweetened cocoa powder
- 1/2 teaspoon salt
Ingredients for the Cherry Filling:
- 2 tablespoons water
- 2 cups pitted cherries, fresh or frozen
- 1 teaspoon vanilla extract
- 1 teaspoon lemon juice
- 1 tablespoon cornstarch
- 1/3 cup granulated sugar
Ingredients for the Whipped Cream Frosting:
- 1/3 cup powdered sugar
- 2 teaspoons vanilla extract
- 3 cups chilled heavy whipping cream
Ingredients for the Chocolate Decoration:
- 4 ounces semisweet or dark chocolate
- For decorating Extra cherries, optional
All kitchen essentials:
- Mixing bowl
- 2 9-inch round cake pans
- Rubber spatula
- Saucepan
- Electric hand mixer or stand mixer
- Whisk
- Vegetable peeler or chocolate grater
- Cake turntable, optional
- Serrated knife
Full instructions on how to make a classic Black Forest cake:
1. Preparing the Cake Pans
First, prepare the oven by preheating it to 350°F, 175°C.
Now, use two 9-inch round cake pans and grease them.
Lightly line the bottom with parchment paper.
Lightly grease the parchment.
This makes it easier to remove the chocolate cake layer after baking.
More Recipe: –
Lone Star Chocolate Slab Cake With Warm
Chill And Thrill No-Bake Icebox Cake
Golden Crust Stuffed French Bread Cake
2. Mixing the Dry Ingredients
Use a large mixing bowl.
Add the following ingredients and whisk them together:
Cocoa powder, flour, salt, baking soda, baking powder, and granulated sugar.
Keep whisking well to ensure the cocoa powder and leveling agent are evenly distributed.
3. Adding the Wet Ingredients
Add the egg, buttermilk, vegetable oil, and vanilla extract.
Continue beating until the batter is smooth and well combined.
The batter thickens at this stage.
4. Add hot water or coffee
Slowly add hot water or coffee and mix gently.
Don’t worry if the batter becomes thin—this is normal.
The hot liquid helps hydrate the cocoa powder and creates a deeper chocolate flavor.
If you use coffee, it usually doesn’t create a strong coffee flavor; instead, it enhances the chocolate flavor.
5. Bake the chocolate cake
Divide the batter evenly into the prepared pan.
Now bake for about 25 to 30 minutes, or until a toothpick inserted in the center comes out with a slightly moist crumb.
Avoid overbaking, as this can dry out the cake crust.
Remove the pan from the oven and let the cake cool for about 10 to 12 minutes.
Carefully transfer the cake to a wire rack and cool completely.
6. Preparing the Cherry Filling
While the cake is cooling, prepare the cherry filling.
Place the cherries and sugar in a saucepan over medium heat.
Continue cooking until the cherries release their juices.
Using a small bowl, whisk the cornstarch and water until smooth.
Add the cornstarch mixture to the cherries and continue stirring.
Continue cooking with the mixer for about 2 minutes, until the mixture thickens.
Remove from heat and add the lemon juice and vanilla extract, stirring constantly.
Allow the cherry filling to cool completely before making the cake.
Tip: Hot cherry filling can soften or melt the whipped cream, so make sure it’s cool before using.
7. Making the Whipped Cream
Pour the cooled heavy whipping cream into a large, chilled bowl.
Add the powdered sugar and vanilla extract and continue mixing.
Use an electric mixer and beat on medium-high speed until the cream forms thick peaks.
Avoid over-whip the cream, as it may become grainy and eventually turn into butter.
Refrigerate the whipped cream until the cake is ready to be made.
8. Preparing Chocolate Shavings
Use a vegetable peeler or chocolate grater to create chocolate curls or shavings.
Set aside to decorate the finished cake.
You can use semi-sweet, dark, or butter-sweet chocolate, depending on your preferred sweetness.
9. Leveling the Cake Layers
Once the cake is completely cool, if the top remains domed from baking, it’s best to carefully use a serrated knife to cut it off.
Try to make both layers approximately the same thickness.
For taller cakes, carefully cut each layer horizontally to create thinner layers.
For an easier approach, keep both layers whole.
10. Making the First Layer
Place one chocolate cake layer on a cake stand or serving plate.
Now spread a generous layer of cake cream.
Be sure to leave a slight border around the edge.
Pour the cooled cherry filling over the whipped cream.
Spread it gently so the cherries are evenly distributed.
11. Adding the Second Layer to the Cake
Place the second chocolate cake layer on top.
Now press down very lightly to ensure the layers look even.
Apply whipped cream to the top and sides of the cake.
Now you don’t need to create a perfectly smooth finish.
A slightly rustic look with chocolate shavings looks very beautiful.
12. Decorating the Cake
Drizzle chocolate shavings around the edges and sprinkle more on top.
Make small swirls of whipped cream around the top edge.
If you like, you can place a cherry on top of each cream swirl.
For a perfect presentation, add an extra chocolate curl in the center.
13. Chilling Before Serving
Be sure to refrigerate the completed Black Forest cake for about 2 hours before serving.
Chilling allows the layers to set properly and makes slicing much easier.
For the best flavor and texture, take the cake out of the refrigerator about 10 to 12 minutes before serving.
Now you can serve and enjoy this classic Black Forest cake.
Expert Tips for Making a Classic Black Forest Cake:
Use good quality cocoa powder.
Avoid overbaking the cake.
Be sure to keep the cream chilled.
Chill everything before assembling.
Avoid overfilling the layers.
Be sure to chill the finished cake.
Should I use fresh, frozen, or candied cherries?
You can use different types of cherries depending on availability. Fresh cherries: When in season, they provide a bright, fresh flavor.
Frozen cherries: Convenient and work best. Thaw them before making the filling, but this isn’t always necessary.
Canned cherries: When fresh or frozen cherries are not available, you can use them. Be sure to strain them thoroughly and adjust the amount of sugar depending on the sweetness.
Some Variation Suggestions:
You can try these variations to make a classic Black Forest cake different.
To make a chocolate ganache version: Spread a thin layer of chocolate ganache between the cake layers or drizzle the ganache over the finished cake.
To make an extra chocolate Black Forest cake: Use dark chocolate shavings and layer a thin layer of chocolate frosting under the whipped cream.
For mini Black Forest cakes: Bake the chocolate cake on a sheet pan and use a round cookie cutter to cut out individual cake rounds.
Layer them with whipped cream and cherries for individual desserts.
For Black Forest cupcakes: Divide the batter into lined muffin cups and convert the recipe into cupcakes. Once cooled, top with whipped cream and cherries.
To make an alcohol-free Black Forest cake: This recipe is already easy to make without alcohol. If you prefer more moisture between the layers, be sure to use cherry juice or your own natural cherry juice filling.
Storage Tips:
Black Forest Cake is best refrigerated because of its whipped cream and fruit filling.
Cover the cake with a cake dome or store it in an airtight container.
For best quality, it can be stored in the refrigerator for up to 3 days.
Let the cake cool slightly before serving.
Can I freeze Black Forest Cake?
Chocolate cake layers are best frozen. Wrap the completely cooled cake layers tightly in plastic wrap, then wrap them in aluminum foil and refrigerate them for up to 3 months.
Thaw the cake layers in the refrigerator before assembling. For the best texture, prepare the whipped cream and cherry filling fresh when the cake is ready to assemble.
FAQ.
Answers to questions about the classic Black Forest Cake.
Q. What is Black Forest Cake?
Black Forest cake is a chocolate layer cake traditionally associated with the Black Forest region of Germany. This chocolate cake is famous for its combination of whipped cream, cherries, and chocolate decorations.
Q. Why is it called Black Forest?
It’s name is a reference to the Black Forest region of Germany, which is traditionally associated with cherry-based flavors.
Q. Can I use canned cherries?
Absolutely! If fresh or frozen cherries are not available, canned cherries can be used. Drain them thoroughly before preparing the filling.
Q. Can I make Black Forest cake ahead?
Absolutely! Bake the cake layers a day in advance and keep them tightly wrapped. You can also assemble the cake several hours before serving and refrigerate it.
Q. Why does whipped cream become thin?
It could be that the cream isn’t cold enough or there’s less whipped cream. Make sure to use chilled heavy whipping cream and whip it until it forms firm peaks.
Q. How can I prevent the cake from slipping?
Don’t use too much filling. Make sure the cherry mixture is completely chilled and, if necessary, refrigerate all the prepared layers.
Q. Can I use store-bought chocolate cake?
Absolutely! If you’re short on time, you can use prepared chocolate cake layers, but homemade cake helps give the dessert a fresher texture and flavor.
Q. Can I use whipped topping instead of whipped cream?
Absolutely! Refrigerated whipped topping is an easy option, although traditional homemade whipped cream gives a fresher flavor.
Q. Can I keep Black Forest cake for longer?
Because of the whipped cream and cherries, you can enjoy refrigerated Black Forest cake for about three times.
Q. Can I make it without coffee?
Yes! You can use hot water instead of hot coffee. Coffee is an alternative; it’s mainly used to enhance the chocolate flavor.
Q. Which chocolate is best for garnishing?
Semisweet or dark chocolate tastes great, as its slight bitterness helps balance the sweet cake and the whipped cream.
Final Thoughts
Classic Black Forest Cake brings together everything you need in a special occasion dessert: moist chocolate cake, juicy cherries, fluffy whipped cream, and lots of chocolate. But the finished cake looks quite substantial.
Breaking down the recipe into simple steps makes it much easier for home bakers.
First, prepare the chocolate layers, then let everything cool completely, then top the cake with cherry filling and whipped cream.
Finish with chocolate shavings and cherries for a beautiful presentation.
Whether you serve it for a birthday, holiday party, or simply want a homemade chocolate dessert, this classic Black Forest Cake makes a memorable centerpiece for the dessert table and will surely never disappoint.